Show summary Hide summary
- Start simple: what you actually need
- When splurging makes sense — and when it doesn’t
- The single non-negotiable: sanitization
- Measuring strength and progress
- Temperature matters — more than you might expect
- Oxygen: useful, then dangerous
- Clearing, aging and what patience does
- Kegging vs. bottling: trade-offs
- Yeast selection and reuse
- Common pitfalls and how to avoid them
More people are turning their kitchens and garages into small-scale breweries — a trend driven by rising drink costs, interest in craft flavors, and the appeal of a hands-on pastime. If you’re thinking of trying it, a few basic tools and a bit of hygiene know-how will get you a reliable first batch without needing a lab or a big budget.
Start simple: what you actually need
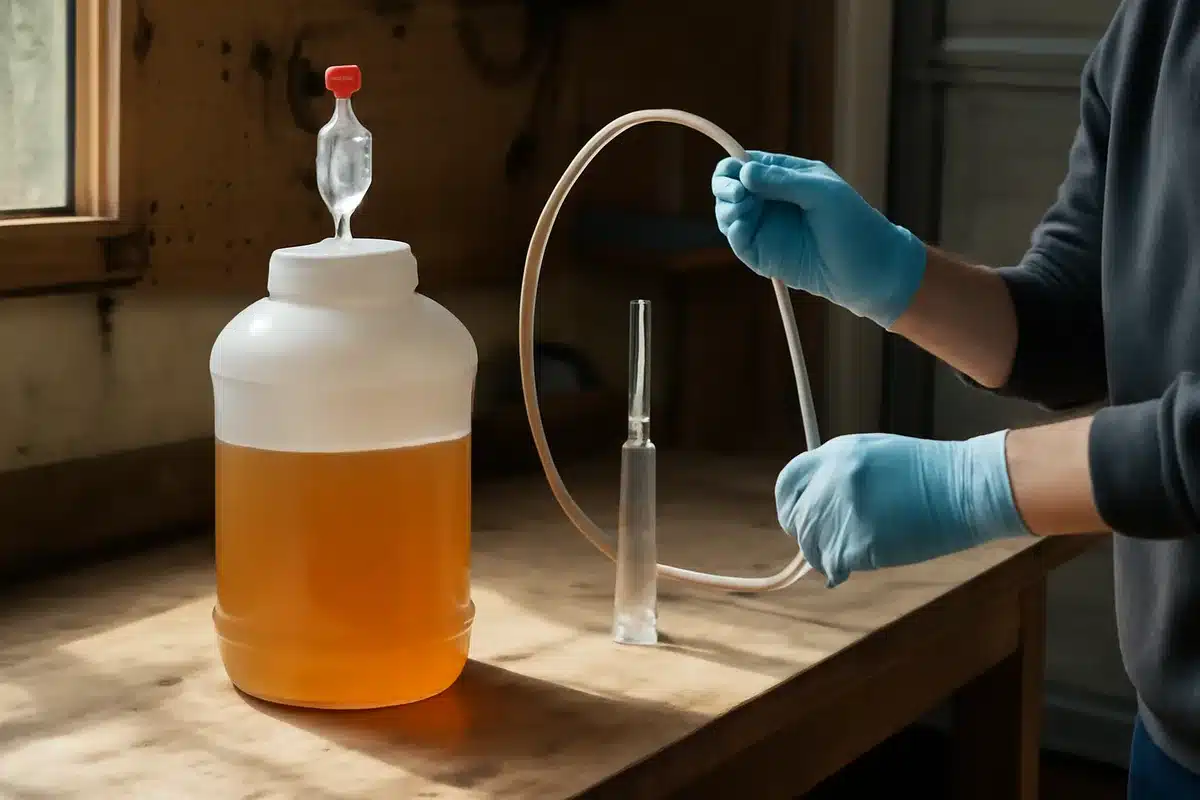
You can begin with almost nothing more than a food-safe bucket or carboy and a way to vent carbon dioxide. At its most basic, home fermentation is just sugar, yeast, and time. That low bar is why so many people find the hobby accessible.
Caramel, butterscotch, toffee: how their differences affect your desserts
McDonald’s rebrands Twitter to honor Bubba Wallace after his first NASCAR Cup win

Still, a handful of inexpensive items will make the process cleaner and more predictable: a siphon for moving liquid, a simple airlock, and a measuring instrument to track strength. These small investments reduce waste and help you learn faster.
| Priority | Item | Why it helps |
|---|---|---|
| Essential | Food-safe fermenter & airlock | Contains fermentation and prevents airborne contamination |
| Helpful | Hydrometer or refractometer | Measures sugar and estimates alcohol content |
| Convenient | Siphon & bottling wand | Safer, less messy transfers between vessels |
| Optional pro | All-in-one brewer or temperature-controlled fermenter | Automates steps and improves consistency |
When splurging makes sense — and when it doesn’t
High-end gear can simplify brewing and raise quality, but it’s not mandatory. Systems that automate mashing, sparging and temperature control can cost thousands, yet they open the door to full all-grain brewing — the route for people who want maximum control and customization.
Less costly upgrades, like Bluetooth thermometers, a refractometer, or a cheap fermentation fridge built from a mini-fridge and a thermostat, deliver measurable improvements without breaking the bank.
The single non-negotiable: sanitization
Contamination is by far the most common cause of ruined batches. Cleanliness should be treated as the core discipline of brewing: any container, tubing or bottle that contacts the beer must be free of microbes.
Explainers and veteran brewers recommend two steps: thorough cleaning to remove organic residue, followed by a food-safe sanitizer. A no-rinse sanitizer creates a disinfected surface that protects the batch during transfer and bottling.
Measuring strength and progress
A simple tool like a hydrometer gives you the confidence to know where fermentation stands. Take an initial reading before pitching yeast (the original gravity) and periodic readings during fermentation to track progress.
If readings stop changing and you haven’t reached the expected final gravity, you may have a stalled fermentation. Remedies range from gently warming the fermenter to adding fresh yeast. Online calculators help convert gravity numbers into estimated alcohol by volume.
Temperature matters — more than you might expect
Yeast are living organisms with temperature preferences. Run them too warm and they can produce harsh off-flavors; too cold and fermentation can slow or stop. The ideal range depends on the strain and the style you’re making, so consult the yeast supplier’s guidance.
Simple temperature-control hacks work well for beginners: an ice bath or “swamp cooler” can drop temps, while a seedling heat mat can lift them. For consistent results, hobbyists often retrofit a small fridge with a thermostat to hold fermentation within a narrow band.
Oxygen: useful, then dangerous
Introducing oxygen before fermentation helps yeast establish themselves, especially in beers where boiling strips dissolved oxygen. However, once yeast are active, oxygen exposure can spoil flavors. Limit air contact during transfers and use sealed systems when possible.
Clearing, aging and what patience does
Cloudiness is normal in many homebrews and often harmless. If you prefer a clear finish, time helps — yeast and particulates settle during secondary conditioning. Techniques like cold-crashing, finings (gelatin, isinglass, bentonite), or extended refrigeration can speed the process.
Aging softens rough edges. Most beers benefit from a few weeks to a few months of conditioning; wines and some ciders may need longer. But over-aging can erode fresh, bright flavors, so plan timing to match the style.
Kegging vs. bottling: trade-offs
Kegging reduces repeated bottle cleaning and makes serving draft straightforward, but it requires a bigger initial layout — kegs, regulators and CO2. Bottling is cheaper to start but raises the risk of overcarbonation if priming sugar calculations are off.
- Pros of kegging: faster dispensing, reusable hardware, easier force-carbonation.
- Cons of kegging: higher upfront cost, less portability for sharing single bottles.
- Bottling risks: bottle type matters, and too much priming sugar can cause dangerous pressure.
Yeast selection and reuse
Different yeast strains shape alcohol tolerance, flavor profile, and ideal fermentation temperature. Baker’s yeast will ferment, but using brewing-specific strains yields more predictable and stylistically appropriate results. Many brewers harvest healthy yeast from a finished batch to reuse in future brews, saving money and preserving desirable traits.
Common pitfalls and how to avoid them
Most beginner mistakes are recoverable as long as contamination hasn’t set in. Avoid premature bottling, be careful with priming sugar amounts, and don’t panic at the first sign of hesitation in fermentation — there are routine fixes.
- Always sanitize equipment before bottling or kegging.
- Record temperatures and gravity measurements so you can troubleshoot.
- If fermentation stalls, try gentle warming or adding active yeast.
- Never discard a batch unless it shows clear signs of infection such as mold or a rotten smell.
Homebrewing today is part craft, part science and largely approachable. Whether you treat it as an occasional weekend project or plan to scale up, the fundamentals — clean gear, basic measurement, and temperature control — will get you to drinkable, often impressive results. The current interest in homemade beverages means more resources, communities and affordable equipment than ever, so the barrier to entry keeps getting lower.
Irish whiskey: approachable bottles new drinkers should try today
Fishtown restaurants ranked: must-visit spots locals are raving about